How to Use Quizlet
Teachers: Getting Started
- Step 1: Download the app from the app store.
- Step 2: Sign up by coming up with a username and password.
- Step 3: Create a class. Name your class and select your school. (This must be done on web version).
- Step 4: Invite students to join your class. You can do this via emailing your students, or searching for their Quizlet username and Quizlet will send them an invitation. (This must be done on web version).
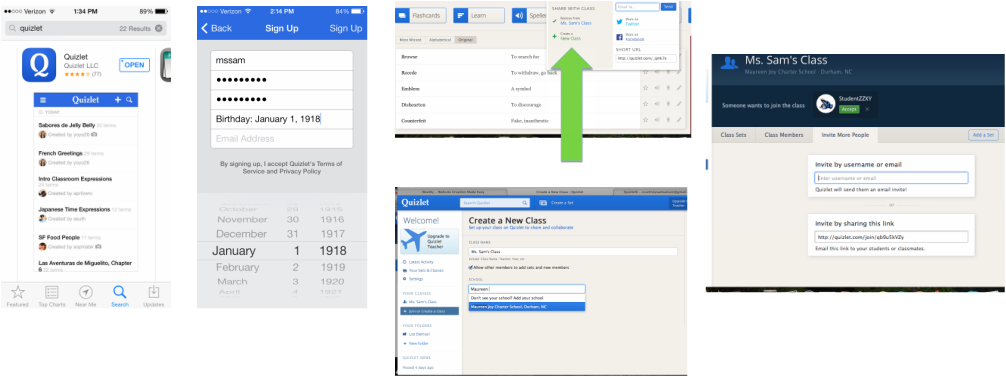
Step 1 Step 2 Step 3 Step 4
Students: Getting Started
- Follow Steps 1 and 2 above.
- Step 3: Once logged in, you can either search for your classroom and join the class or accept the teacher's invitation to join.
- Step 4: To confirm you have joined the class, click the icon on the top left sign of the screen to scroll over and see that you are enrolled in the class.
- Step 5: The sets that belong to your class should be on your home screen.
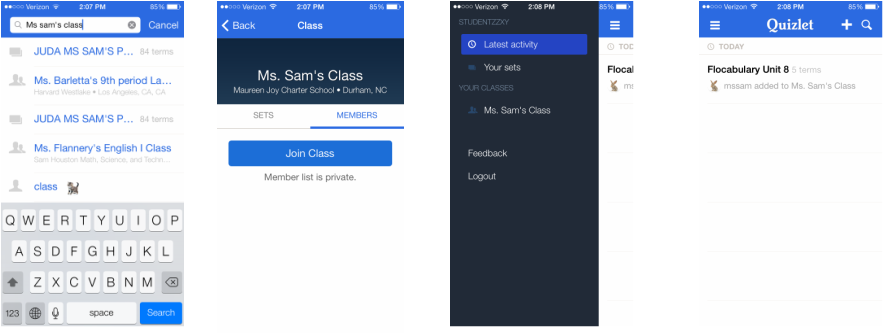
Step 3: Searching for the class Step 3: Requesting to Join the Class Step 4: Confirming you're in the class. Step 5: Home screen with class flash card sets.
Teachers: Adding Flash Card Sets to Your Class
MAKING YOUR OWN FLASH CARD SET (Students can also follow these directions to make their own flash card sets.)
- Step 1: From the mobile app, click the + sign at the top of your screen.
- Step 2: Start typing in a term and definition for your first card.
- Step 3: Keep pressing +Add Card and making new cards until you are done. Then click "Finish" at the top when you are done with your set.
- Step 4: Give the set a name. Click either "Everyone" or "Just Me" depending on who you want to be visible to.
- Step 5: In order to add it to your folder or library, you will have to go to the web version. Click "Your Sets".
- Step 6: Find the set. Click on it.
- Step 7: Scroll over to "Share" on the right side of the screen.
- Step 8: Click "Add to (The class you want)".
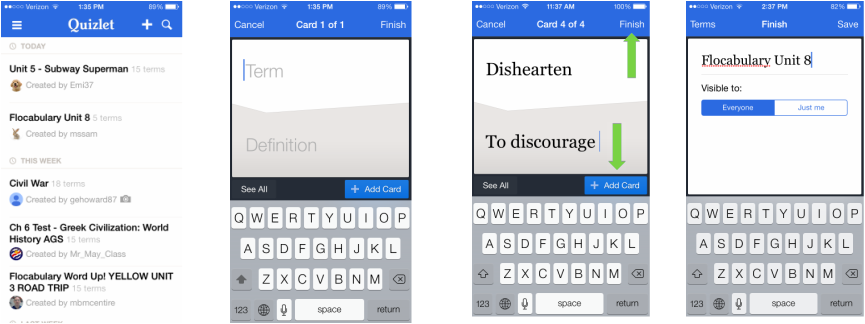
Step 1 Step 2 Step 3 Step 4
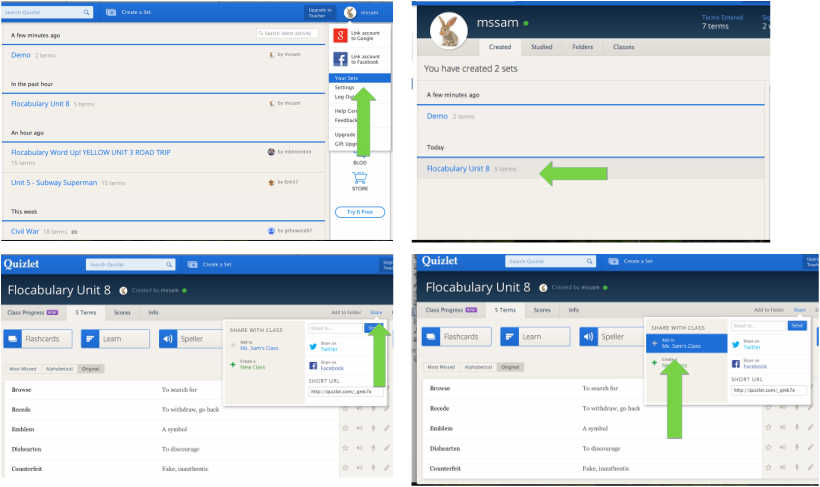
Clockwise, from top left: Step 5, Step 6, Step 7, Step 8
Teachers: Adding Flash Card Sets to Your Class (Continued)
SAVING A PRE-MADE FLASH CARD SET FROM ANOTHER USER (Students can also follow these directions to find flash card sets.)
- Step 1: From the home screen, click the magnifying glass icon at the top.
- Step 2: Type in a keyword in the search engine.
- Step 3: Browse the sets.
- Step 4: Select the set you want. On your mobile, you can study the set and do the activities related to that set, but if you want to add it to your class, you will have to add it on the web version by accessing the "Recent Activities" tab on the home page.
- Follow steps 5-8 above on the web version to add it to your class.
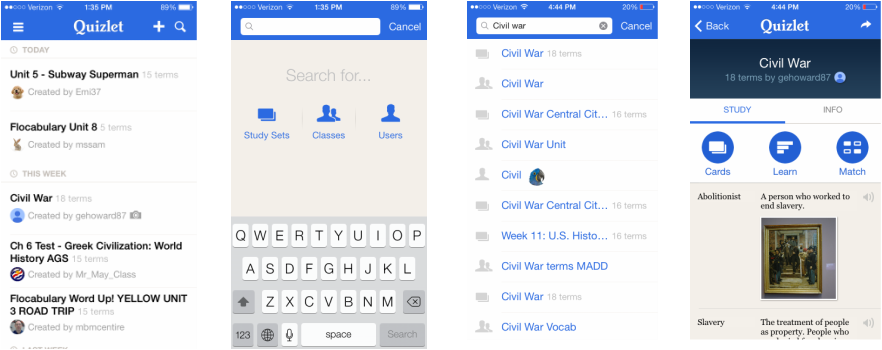
Step 1 Step 2 Step 3 Step 4
Students: Studying the Flashcards
- Step 1: Open the set you want to study. Tap "Cards".
- Step 2: Quiz yourself by guessing the definition of the term on the card.
- Step 3: Tap the card to reveal the definition. Scroll down and repeat for each card.
- Step 4: If you want, reverse it. Click the settings icon at the top of the screen and click "back" to reveal the definition and to guess the term instead.
- Step 5: You may also instead tap the "volume" button at the top to turn the volume on, and then press the "play" button to have someone read the terms and definitions to you.
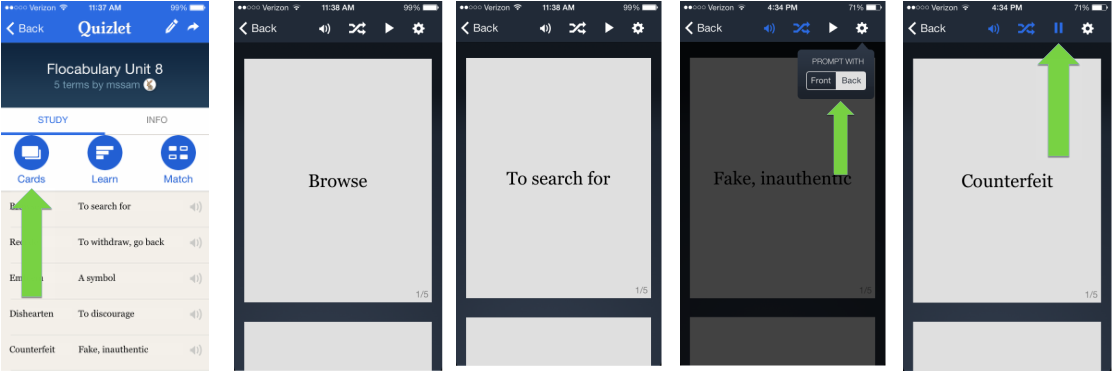
Step 1 Step 2 Step 3 Step 4 Step 5
Students: "Learning" the Terms
- Step 1: Open the set you want to study. Tap "Learn".
- Step 2: Read the definition. Type in the correct term. Make sure to spell it correctly, or it won't count.
- Step 3: Tap "Go". If the word was correct, the checks turn green and move on to the next word. If you typed the incorrect word or spelled it incorrectly, it will tell you the right answer. Type in the right answer to proceed.
- Step 4: If you don't know the word, tap "Don't Know." The app will tell you the right answer and then you type it in to move on.
- Step 5: Check out how you did at the end. "Unknown" means that you didn't answer the question correctly the first time, "Learned" means you answered the question correctly, and "Mastered" means you answered the question correctly twice (the game runs it through for you a second time when you press "Next".) Do it again to beat your previous score!
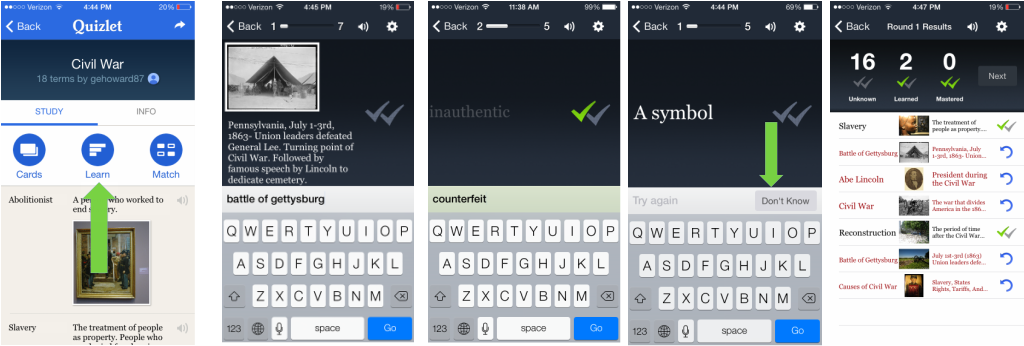
Step 1 Step 2 Step 3 Step 4 Step 5
Students: The "Match" Activity
- Step 1: Open the set you want to study. Tap "Match."
- Step 2: Tap a word or definition It will turn blue. Try to match each term with its definition (note: they are not organized by column or row; the word and its definition could be in the same column or row.) When you make the correct match, the pair turns green and disappears. If you make an incorrect match, they will turn red and you have to try again.
- Step 3: Make matches until everything disappears.
- Step 4: The app will tell you your time. Do it again to beat your time!
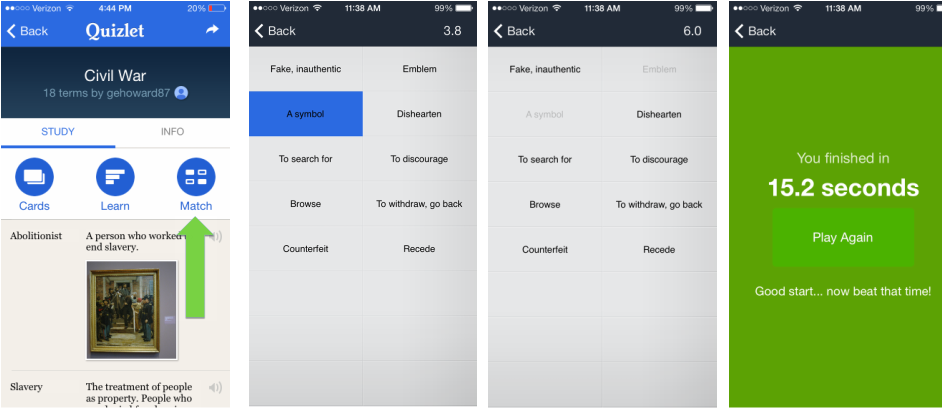
Step 1 Step 2 Step 3 Step 4
Students: Additional Study Activities on the Web Version
Here are some quick highlights of the additional study activities you can do on the web version. I'm not going into detail on these since these aren't capable on the mobile apps, and the directions are very clearly spelled out for each activity on the website.
- Option 1: The Speller. Type what you hear. An automated voice will say the word and you have to type it in correctly.
- Option 2: The Test. There are 5 written questions in which you must provide the correct word, five multiple choice questions, and five true/false questions.
- Option 3: Scatter. Similar to the "Match" activity on the mobile app, drag each term on top of its definition until all of the pairs disappear.
- Option 4: Space Race. Definitions will scroll across the screen. "Destroy" them by typing in the correct term and pressing "enter". Do it before the definition gets all the way across the screen.
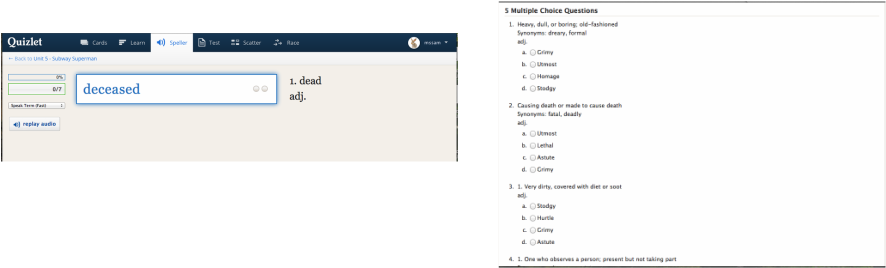
The Speller The Test
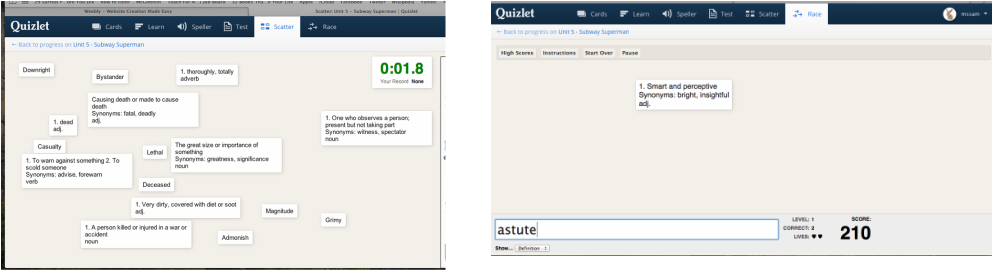
Scatter Space Race
For more tips on how to use the app, check out my tutorial video on the "Artifact" tab.
